一、依靠github创建自己的博客文档。

步骤1

此步骤网上教程拼接得到,按需调整(放在最后生成上传之后查看是否需要)打包上传从本地测试感觉似乎github有缓存

步骤2

电脑上安装 hugo

window 平台只需下载一个exe进行安装即可,以下为安装教程

官网教程

用hugo建站

1、初始化站点

hugo new site blogsname

2、添加一个主题

主题选择

1
git submodule add -b master https://github.com/xianmin/hugo-theme-jane.git themes/jane

clone好主题以后 将 themes/jane/exampleSite/content 中的内容剪切到 blogsname文件夹下的content中

将 themes/jane/exampleSite/config.toml 复制到 blogsname文件夹下

3、本地测试

1
    hugo server

运行成功后访问 localhost:1313

4、打包

1
运行 hugo

打包后的文件在public中

将public中的文件上传到第一步创建的.io的项目中,访问 https://name.github.io即可

以上 创建完成

二、借助issues建立评论系统

借助开源插件 gitment

引入及安装教程详见官网

1、在博客根目录下运行
1
npm i --save gitment
2、网页申请认证
1
2
3
4
Application name:随便写
Homepage URL:这个也可以随意写,就写你的博客地址就行
Application description:描述,也可以随意写
Authorization callback URL:这个必须写你的博客地址
3.gitment配置
 1
 2
 3
 4
 5
 6
 7
 8
 9
10
11
12
13
14
15
# Gitment
# Introduction: https://imsun.net/posts/gitment-introduction/
gitment:
  enable: true
  mint: true # RECOMMEND, A mint on Gitment, to support count, language and proxy_gateway
  count: true # Show comments count in post meta area
  lazy: false # Comments lazy loading with a button
  cleanly: false # Hide 'Powered by ...' on footer, and more
  language: # Force language, or auto switch by theme
  github_user: {you github user id}
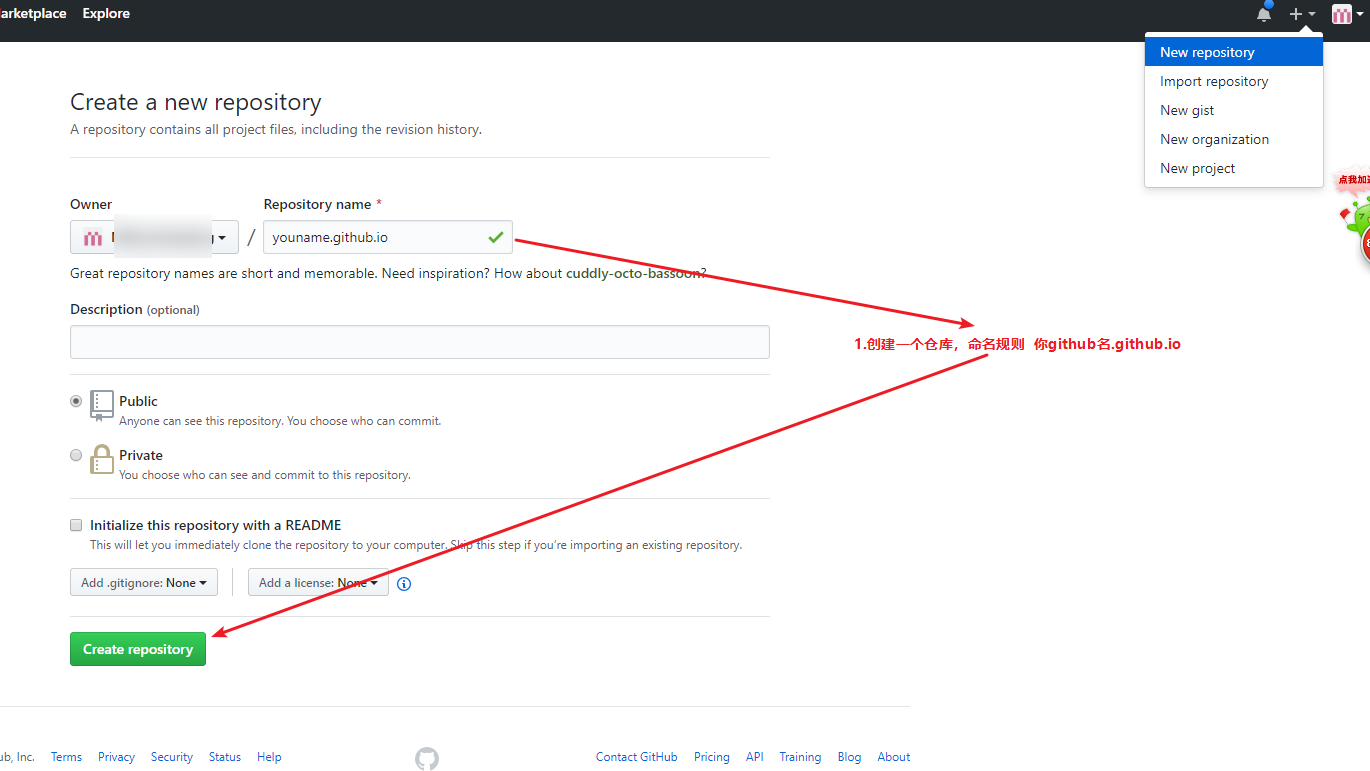
  github_repo: 随便写一个你的公开的git仓库就行,到时候评论会作为那个项目的issue
  client_id: {刚才申请的ClientID}
  client_secret: {刚才申请的Client Secret}
  proxy_gateway: # Address of api proxy, See: https://github.com/aimingoo/intersect
  redirect_protocol: # Protocol of redirect_uri with force_redirect_protocol when mint enabled

项目实际配置

1
2
3
4
5
6
7
config.toml 中

[params.gitment]          # Gitment is a comment system based on GitHub issues. see https://github.com/imsun/gitment 关于git的评论系统
    owner = "MMmaXingXing"              # Your GitHub ID
    repo = "comments"               # The repo to store comments
    clientId = ""           # Your client ID
    clientSecret = ""       # Your client secret
4、项目引入
 1
 2
 3
 4
 5
 6
 7
 8
 9
10
config.toml 中 手动写入cdn

[params.publicCDN]        # load these files from public cdn                          # 启用公共CDN,需自行定义
    enable = false
    jquery = '<script src="https://cdn.jsdelivr.net/npm/jquery@3.2.1/dist/jquery.min.js" integrity="sha256-hwg4gsxgFZhOsEEamdOYGBf13FyQuiTwlAQgxVSNgt4=" crossorigin="anonymous"></script>'
    slideout = '<script src="https://cdn.jsdelivr.net/npm/slideout@1.0.1/dist/slideout.min.js" integrity="sha256-t+zJ/g8/KXIJMjSVQdnibt4dlaDxc9zXr/9oNPeWqdg=" crossorigin="anonymous"></script>'
    fancyboxJs = '<script src="https://cdn.jsdelivr.net/npm/@fancyapps/fancybox@3.1.20/dist/jquery.fancybox.min.js" integrity="sha256-XVLffZaxoWfGUEbdzuLi7pwaUJv1cecsQJQqGLe7axY=" crossorigin="anonymous"></script>'
    fancyboxCss = '<link rel="stylesheet" href="https://cdn.jsdelivr.net/npm/@fancyapps/fancybox@3.1.20/dist/jquery.fancybox.min.css" integrity="sha256-7TyXnr2YU040zfSP+rEcz29ggW4j56/ujTPwjMzyqFY=" crossorigin="anonymous">'
    gitmentJS = '<script src="https://cdn.jsdelivr.net/npm/gitment@0.0.3/dist/gitment.browser.min.js" crossorigin="anonymous"></script>'
    gitmentCSS = '<link rel="stylesheet" href="https://cdn.jsdelivr.net/npm/gitment@0.0.3/style/default.min.css" crossorigin="anonymous">'
5、出现的问题
1
2
3
4
5
6
7
使用gitment,要先在评论区登录github,否则显示Error: Comments Not Initialized(中文显示评论不可用之类);登录后点击Initialize Comments。另外可能会报错[object ProgressEvent]或者gh-oauth.imsun.net链接不上。这是因为gh-oauth.imsun.net网站证书失效了!解决方法:

方案一:单独访问这个网站https://gh-oauth.imsun.net/,加入例外,允许浏览器访问。但这个方案,别人看你博客的人不一定知道要加,所以不好。

方案二:更改node_modules/gitment/dist/gitment.js中https://gh-oauth.imsun.net,直接改为请求 github 认证的接口https://github.com/login/oauth/access_token

参考:imsun/gitment/issues#102,gitment评论模块接入hexo

3、使用不蒜子添加网站及文章访问量

 1
 2
 3
 4
 5
 6
 7
 8
 9
10
11
12
13
14
15
config.toml中CDN部分增加

busuanziJs = '<script async src="//busuanzi.ibruce.info/busuanzi/2.3/busuanzi.pure.mini.js"></script>'

添加以下代码块

 [params.counter.busuanzi]  # a Chinese visitor counter  # 不蒜子计数器
    enable = true

同时

 moreMeta = false

 即可

4、将github域名更改为自己的域名

1、获取到你github博文的ip,并填入域名提供商的映射文件

2、在博文master分支中创建一个CNAME文件内写入你的域名,即可访问

向我提问